

We all know how curious toddlers can be. And although we aren’t ready for them to pick up any sharp kitchen implements and help us to cook the dinner, what we can do is encourage them to help us with some baking! They can be chief spoon stirrers and chocolate chip positioners! They can help us to decorate the tops of freshly cooled cakes and decide what toppings will go on their cupcakes!
It’s still lockdown, most children are at home with their parents and some might be looking for new ways to entertain their little ones. As a mother myself of a child with some severe food allergies I do a lot of cooking and baking from scratch. On my blog Severn Wishes, I’m always sharing my latest recipes when they turn out well. And today I am sharing some baking knowledge and recipes with all of you on YBC.
Whether your little ones are going to watch you bake from the safety of a high chair, or if they can stand on a stool and help you to stir those ingredients, there’s bound to be a fun recipe for all of you to enjoy and get stuck in to. I have lots of recipes that you can browse and choose one suitable for you.
So what can toddlers help us with in regards to the baking? Here are a few ideas of mine that you can try out at home. I’ve included a few different types of recipes because some baking ingredients still seem so hard to get a hold of! I have been after Caster Sugar for 7 weeks!
I have rated my recipes on ease of completion, for 1 being most difficult to do with children in tow and 5 is easy peasy!
SABRINA’S TOP TIPS: If your little one is still small you could place a large towel on the kitchen floor and do all of the mixing whilst sat at your little one's level. That way they can feel involved even more and watch you! Just weigh out the ingredients first into small bowls before you begin to make it easier on yourself. If you have a toddler who takes direction then make sure to give them clear and easy instructions to follow such as “Stir this until it goes brown” for example. A bit of messy play is always a good thing, right? So don’t worry if they get flour everywhere, because that is what the towel idea is for. *Winking Face*
Remember that some recipes require refrigerator time, sometimes before the baking part, so be prepared to do some prep the night before, before allowing little ones to get stuck in if they haven’t grasped the concept of patience just yet. You may want to do the baking part with hot oven trays, but let your little one decorate. The choice is up to you depending on how old your child is.
Here are some of my personal recipes and methods for you to have a go at, I hope there is one in this list you would like to try.
----------------------------------------------------------------------------------------------------
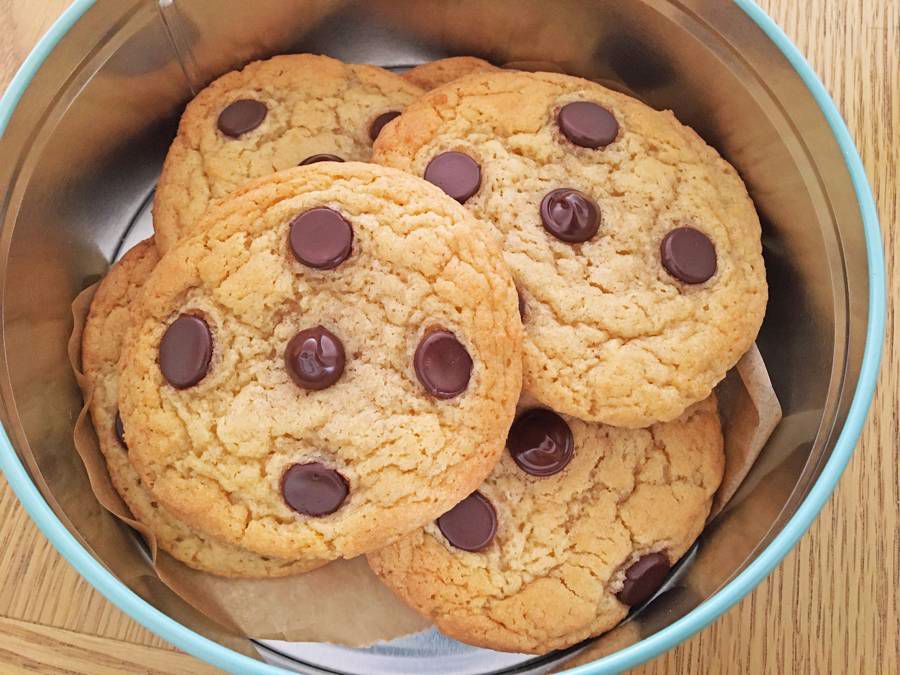
Bake Number One - Chocolate Chip Cookies
Prep Time 15-20 mins
Refrigeration Time 12 Hours to 48 Hours (The longer the fridge time the chewier the cookie)
Cook Time 8-10 mins
Ease of Completion 3/5
Makes 12-16 Cookies
Okay so I am starting with a recipe that is really quick for you to prep the main ingredients for, but you will then need to refrigerate it at least overnight. The cookies taste much better when you do this. So I am giving it a rating of 3 in difficulty. They are so tasty and worth it if you are prepared to prep the cookie dough the day before you plan to bake them.
When I first made this recipe I was doing it so fast I used a mug in my kitchen to measure with, rather than my scales in grams. So you will need a mug!
Ideas: You can make chocolate chip cookies and use the chips to make faces, or if you have some food colouring you could make different coloured cookies. Or if you have older children you could use smarties or M&Ms to decorate. Please make sure you don’t use anything small like these or small hard chocolate eggs with children under the age of five because they are a choking hazard. I prefer to just use dark chocolate chips in mine, they taste great.
You Will Need
A Clean Mug!
Two Bowls – 1 Large and 1 Medium
A Sieve
A Tablespoon and A Teaspoon
A Wooden Spoon
A Flat Oven Tray
Baking Parchment
A Microwave and a Small Microwavable Bowl
Ingredients
½ a Cup of Butter or Dairy Free Spread (softened in the microwave in a small bowl)
1/3 a cup of Caster Sugar
2/3 a cup of Soft Brown Sugar
1 Egg (free range is best)
1 Teaspoon of Vanilla Essence
1 Teaspoon of Baking Powder
½ Teaspoon of Salt
1 and ½ Cups of Plain Flour
A Bag of Dark Chocolate Chips (100g ish) or chocolate items of your choice.
TOP TIP! Use a microwave to soften the spread, between ten and twenty seconds should be enough and then stir it gently until it all melts and is smooth and pourable.
Method
1. In the large bowl start by mixing the two sugar types together, then add the softened spread and combine together until smooth. I use a tablespoon to mix mine together.
2. Next, you need to add the egg and the vanilla and then once you have mixed that together it should be smooth again and look pale with no lumps. You may need to put some elbow grease into this part; a good 60 seconds of constant stirring should do it.
3. In the medium bowl you now need to add the dry ingredients together, these are the baking powder, salt and flour. Make sure to sieve the flour to get rid of any lumps.
4. Now it’s time to combine your wet and dry ingredient bowls into one, the large bowl. Use the sieve again, to shake the dry ingredients into the wet, make sure you do this a bit at a time. I do mine in quarters, a quarter of the dry shook into the wet bowl and mix thoroughly. Then another quarter and mix, and so on. This ensures it combines evenly and you should be left with a smooth pale dough at the end.
5. It is now time to add your extra ingredients, for me it’s always dark chocolate chunks or chips. But depending upon the age of your children you can judge what you would like to place inside your cookies. You can also add some at the baking stage if you would prefer to make a topping such as a face on top of the cookie surface.
6. Now it is time to refrigerate your cookie dough. Do this overnight at the very least! The cookies taste much better and are chewier if you keep the dough cold for at least 12 hours, preferably longer. If you haven’t baked cookies before, you won’t know how they will react in your oven, so when you get to the baking stage you need to keep an eye on them. They won’t take long!
7. When you are ready to bake you should place baking parchment on to a flat oven tray. Preheat your oven to 180’c (mine is fan assisted) and take your dough out of the fridge. Using two tablespoons take a scoop of dough, place a spoon either side and press into an oval shape, as you scrape it on to the parchment it should resemble a heaped round mound of dough. Press it down slightly if you wish to add a further topping to it before baking. You need to leave around 6cm between cookie mounds so they have space to spread out during the bake.
8. You want to bake the cookies in the centre of your oven, rotate the tray 180 degrees after half of the time for an even bake. I do mine for around 8 minutes, but if you make smaller cookies they take less time. TOP TIP Bake two cookies first before you do the batch, time them and you’ll know the best time to do a batch for.
9. How do you know they are done? The cookies will start to change colour, the edges first. You don’t want them to go brown because they will be hard and over baked. It is trial and error because every oven is different. Once the cookies start to change colour remove them from the hot oven and place them on to a flat surface to cool.
10. Once cooled you can either eat them or store them in an airtight container at room temperature for up to 3 days.

----------------------------------------------------------------------------------------------------
Bake Number Two – Triple Chocolate Brownies

Prep Time 40 mins
Cook Time 20-30 mins
Ease of Completion 3/5
Makes 20 Squares
Brownies keep well in an airtight container for 3 days after you bake them. Make sure they are fully cooled before you store them though, and TOP TIP is to keep them on a scrap of the parchment you cooked them on in the base of whatever container.
One of my favourite bakes! My Triple Chocolate Brownies are easily customisable to your own tastes. Keep them triple chocolate, make them minty or orange or even use purely white chocolate and turn them into Blondies! Whatever direction you go with for my recipe I will guarantee a delicious gooey and rich brownie bake at the end. Just remember to follow my Method exactly! It is very important to get the right consistency in the bake. I made this recipe before I had to go dairy-free, so you can choose the extra ingredients to suit your family. My method for the actual brownie won’t change, just what you choose to add into it at Step 5 will.
You Will Need
A Glass Dish or Baking Tray measuring approx 26cm x 20cm (8 x 10″)
Baking Paper or Parchment
A Saucepan
A Large Mixing Bowl
A Wooden Spoon
A Metal Spoon
A Whisk – Manual or Mechanical
A Sieve
A Knife
A Cooling Rack
Ingredients
3 Free Range Eggs (Fresh is best for baking)
175g Plain Chocolate (for melting) (You can use dairy-free chocolate too)
175g Butter (or Dairy Free Spread)
200g Caster Sugar
75g Plain Flour
50g Cocoa Powder
Alternative Flavours
Triple Chocolate Brownies require 75g of White Chocolate Chips and 75g of Milk Chocolate Chips (or use different varieties of dairy-free chocolates). Add these at Step 5.
Chocolate Orange Brownies require 100g of Chocolate that is Orange Flavoured, dairy-free choc orange bars from Asda are fab or Terry’s Chocolate Orange! Put these pieces in the mixture at Step 5 instead of any chocolate chips.
Mint Chocolate Brownies require 75g of Chocolate that is Mint flavoured, with such a strong flavour of chocolate it can be used as part of the melted part at the start of the bake. For a more Minty flavour later on you could add some Aero Mint Chocolate Balls when the brownie is almost cooked! Push them into the top of the brownie before the top is solid leaving just a little sticking out! They might melt, so alternatively you can grate Aero Mint on top of the finished brownies.
Method
1. Firstly you need to start by melting the butter and plain chocolate in a saucepan. Break the chocolate into small bits so that it melts faster. Only melt it on a low heat and slowly. Keep stirring the mixture frequently until it is smooth with no lumps left. TOP TIP I only melt it on the lowest heat setting possible.
2. When it is smooth you want to set the melted chocolate mixture to one side, allow it to cool, it needs to be pourable but cool so it doesn’t scramble the eggs... You can now preheat your oven to 180’c, 160’c for a Fan Assisted or 350F or Gas Mark 4. Also cut a piece of baking parchment for your deep tray and push it inside ensuring you push and fold into the corners too for an even shape.
3. Next take a large bowl and break the 3 Eggs inside, make sure no shell falls in. Using a wooden spoon you then mix them up, add the Caster Sugar gradually while still stirring. Now you need your Whisk, I have an electric one, but you can do it by hand with some elbow grease! Mix until the ingredients are combined and you have a smooth light mixture; it should be a creamy colour.
4. This next part is important, the folding… Using a Large Metal Spoon (if you have one), you now need to fold in the cooled melted chocolate and butter mixture. Start with one spoonful at a time. Keep stirring it through the creamy mixture and keep going one spoon at a time until all of the smooth thick liquids are combined into one large one. It should be a lot of mixture and not at all lumpy. TOP TIP If the chocolate mixture is still hot it instantly cooks the eggs and you end up with a curdled concoction! Make sure it’s cool, lukewarm is best, and stick to my one spoon at a time method in order to reach the correct consistency!
5. Now for the dry ingredients. Using a Sieve take the Cocoa Powder and the Plain Flour and shake gently sieving them into your liquid mixture, again make sure you do this gradually, shaking a little into the bowl and then mixing it through with the spoon until it disappears. Repeat this step until all of the dry ingredients are in the large bowl and the mixture should now be a thick but still pourable liquid.
Now you can add your chocolate chips or buttons or flavours and other bits! Mix them in thoroughly so they don’t get clumps inside the final bake.
6. Pour the entire bowl of mix into your tray with the parchment inside it. The mixture should sit just over halfway inside it; this gives it a little room to rise up slightly. Because it’s a brownie and not a cake, it won’t rise too much. Add any toppings like chocolate chips now, or partway through if they are not bake stable versions. Before you pop the tray into your oven make sure you gently shake it from side to side so the bake is level.
7. Bake the Brownies with the correct setting for your oven, you’re looking for an even bake with a slightly crisp topping, it should change colour, you are looking for the bake to be soft but still cooked in the centre. On average this bake takes between 20 and 30 minutes, depending upon the tray you have used and your oven type. Just keep an eye on it, take it out of the heat and stick a skewer or knife into the centre of it. When the knife comes out almost clean, pull the tray out. Leave it on top of your oven for ten minutes, try the knife again. TOP TIP Remember if you hit a melted chocolate chip you may think it’s not cooked when it is! For this reason, don’t be tempted to overcook it! Watch out for the edges catching in the heat.
Your finished Brownies should be soft with the additional chocolates all melted inside when you cut it! Yum! I’m hungry now! Although this bake takes some work children may enjoy doing the stirring parts for you, and they will definitely enjoy the eating part! Cut your brownie into bitesize little squares ideal for little hands.
Enjoy this Brownie bake on its own or with custard, ice cream or even cream after an evening meal as a delightful dessert.
----------------------------------------------------------------------------------------------------------------
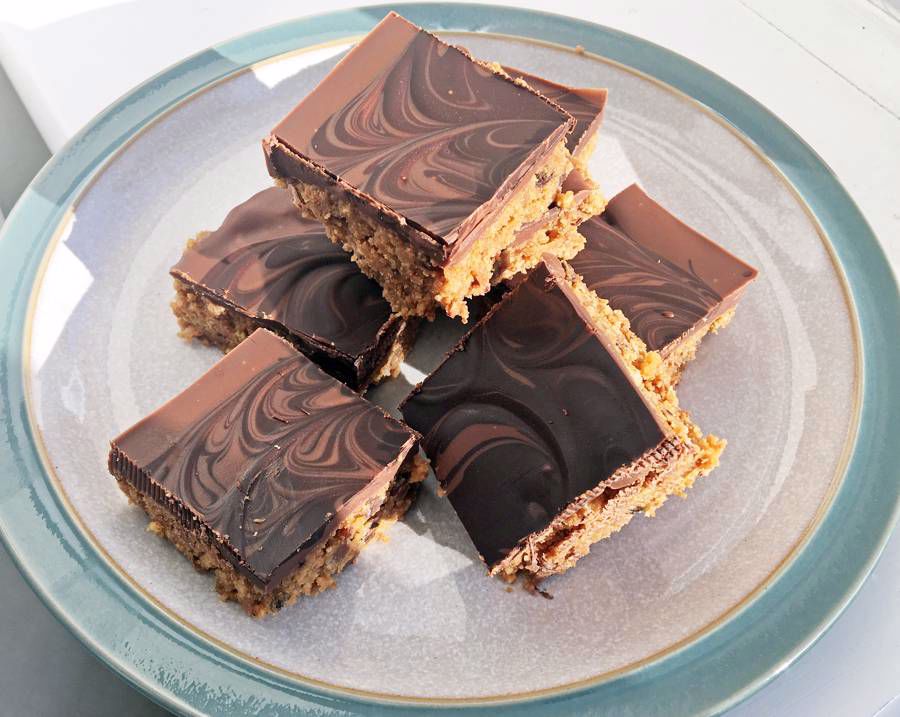
Bake Number Three - No-Bake Fridge Traybake
Prep Time 30-40 mins
Fridge Time 2 hours to fully set
Ease of Completion 4/5
Makes 20 Squares
My tasty Traybake will last for up to a week once made. After cutting it into squares place them into an airtight container and store it inside the fridge at all times.
This is an easy one to do with children because it requires no baking. Just refrigerate for a few hours after you’re finished layering the Traybake in order to let it set. You can really get your little one to help too by pressing down the layers in the tin and decorating the top layer. It is a great way to use up any biscuits that have been open and about to go stale, and a great way to hide things like raisins in to get children to eat some fruit! Pretty much anything goes, so I will give you my basic recipe and a few ideas and you can run with it how you like.
You Will Need
Baking Tray or a Deep Glass Dish
Baking Parchment (if using a glass dish there is no need for the parchment)
Wooden Spoon
Food Processor
Saucepan
Small Glass Bowl
Large Bowl
Knife for chopping up any dried fruit
Traybake Ingredients
250g of Biscuits – Any! The best are Digestives, Ginger Biscuits etc
150g Chocolate – We use Dark
150g Chocolate – Milk or a Dairy-Free Milk Alternative
100g Butter or Dairy Free Spread
125g Golden Syrup
100g Dried Fruits – Cherries, Raisins, Sultanas, Apricots
50g Nuts and Chocolate Chips – Optional – (if you have No Allergies but be careful not to give this to children under a year of age because of the choking hazard these items present).
Topping
200g Chocolate – Any that you like but you could use a mixture of Dark and Milk or DF
50g White Chocolate – Optional – If you would like to create a marble effect on the top.
Method
1. Start by preparing your dish, either use parchment or you can grease with some additional butter / spread to avoid sticking. Glass shouldn’t stick but you can still grease a glass dish to be sure.
2. Blitzing the biscuits can be done in one of two ways, either by placing them into a food bag and taking out some lockdown frustrations on them using a rolling pin (please laugh with me) or you can pop them in a food processor. Either way, you want to have 80% of the biscuits you choose reduced down to a crumb consistency. TOP TIP Children might love to help you with the bashing part, remember to place a tea towel underneath the food bag so as to avoid damaging any surfaces beneath. My earlier tip stands for this too, you might want to do it all on the floor in which case put a large towel down and sit together making this Traybake as a family.
3. While the biscuits are being suitably bashed, you can make the mixture that will bind everything together. This will include the butter, chocolate and golden syrup. Melt these in a saucepan over a low heat and stir continuously until smooth.
4. Take a Large Bowl now, you will want to place the broken biscuits, any chopped dried fruits inside, and then you want to gently pour your melted mixture on top. I advise you to do the liquid mix in quarters, mixing thoroughly each time in order to coat everything enough.
5. Once everything it mixed you want to spoon it into your chosen tray, the children can now take a spoon and help to press it all down evenly and flat. You need a level surface before you can add the top layer. All of this mixing and tipping and flattening should be entertaining for the child/children to help with.
6. The final layer is a mixture of melted chocolate, once you have melted the different chocolate separately you can decorate. In order to get the marble effect you will need to pour on the different types and then use the end of a spoon or a skewer to drag the chocolate around. Children may love to help with this part but it will be warm chocolate so be aware of that.
7. Once you have completed the melted chocolate topping you need to refrigerate the Traybake for between one and two hours, until fully set. If you used parchment you should now be able to lift the Traybake out of the dish and lay it flat. Cut it into 16 squares and enjoy!

----------------------------------------------------------------------------------------------------------------
Bake Number Four - Cupcakes
Vanilla Cupcake Recipe
Prep Time 25-30 mins
Cook Time 20-25 mins
Ease of Completion 4/5
Makes 12 Cupcakes
Store in an air tight container and they should last up to 3 days.
Cupcakes are one of the easiest cakes to make and little ones will love decorating them once they are completed. I love experimenting with toppings and you could even do a Rainbow Icing for the tops if you’re feeling adventurous!
You Will Need
Cupcake Baking Tray
Paper Cupcake Cases
Wooden Spoon
Electric Whisk (Optional but saves time)
Hand Whisk
Large Bowl
Sieve
Wire Rack
Small Bowl/s (Optional – See step 10 for how to make Rainbow Icing)
Cake Mixture
200g Unsalted Butter or Dairy Free Spread
200g Golden Caster Sugar
3 Medium Eggs (Free Range if you can get them)
2 Tsp Vanilla Essence or Extract
200g Self Raising Flour
1-2 Tbsp Milk or Milk Alternative (if your mixture isn’t smooth enough see step 3)
Vanilla Buttercream Icing
160g Unsalted Butter or Dairy Free Spread
300g Icing Sugar
1 Tbsp Milk or Milk Alternative
1 Tsp of Vanilla Essence or Extract
Method
1. Preheat your oven to 180’c or 160’c for a fan assisted. Place your cupcake cases into your tray and prepare the ingredients ready for mixing.
2. In a large bowl mix butter and sugar together. Beat and mix with either a wooden spoon or a whisk but your aim is to have a mixture that is smooth, pale and a fluffy consistency. This should take a couple of minutes.
3. Add the eggs one at a time and make sure you mix each one in fully before adding the next. Then you add the Vanilla and combine this as well. Using a Sieve to avoid lumps, shake the flour into the bowl in four equal parts, making sure you stir well to combine in between. You are aiming for a batter that is smooth and easily falls off your wooden spoon, if your batter does not do this, this is the time to add the milk or milk alternative, a small amount at a time. Mix until the batter does as described above. There should be no lumps and a consistent colour.
4. You now need to divide your cake mixture between the cupcake cases, make sure that you make them level. TOP TIP Use a teaspoon and count how many spoons go into each one. Do all cases with one spoonful, then all with two spoonfuls and so on. Aim to use up all the mixture between the cases.
5. You want to bake your cakes for between 20 and 25 minutes depending on your oven. Use a skewer to check your cake, choose a middle cake and skewer the middle, if it comes out clean your bakes are done. TOP TIP always keep an eye on them after about 18 minutes, some ovens will require you to turn the tray around so as they don’t catch and go brown on edges.
6. Transfer the cupcakes out of the hot tray, please take care as they will be hot for a few minutes so do not let children help you at this stage, place them on a wire cooling rack. They must cool completely before you can decorate. Use this cooling time to decide what they want to put on top of their cakes!
7. Making the icing is fun! You need to place all the buttercream ingredients into a bowl, mix them thoroughly, preferably with a whisk but if you don’t have one you can use your arms but it may take a fair bit of beating! Within 4 or 5 minutes of whisking, you should have a fluffy and pale looking buttercream.
8. If you have a piping bag you can use this to pipe the swirls of icing on to your cooled cupcakes, or you can smother them with icing and let your children decorate them.
9. Decorate your cakes with whatever you fancy! Fresh fruit chopped into small chunks, chocolate chips, jam or even grated chocolate and sauce work well too! The choices are endless!
10. If you would like to make a Rainbow Icing you need to mix your buttercream icing as described in step 7, then using food colouring, separate the icing into several small bowls. Add the amount of food colouring as stated on the packaging and then using a piping bag, add small spoonful’s of the different colours into the bag, one after the other. When you pipe on to the cupcakes in a swirl pattern the colours should merge together in the swirl.
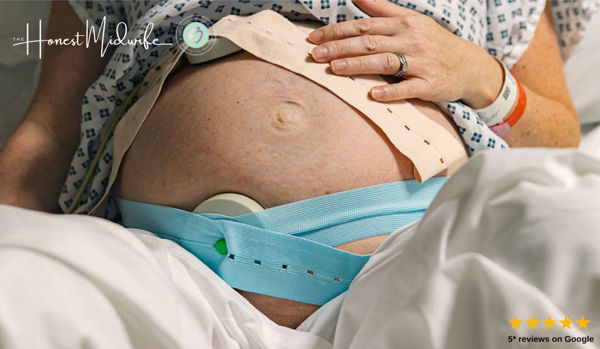
Join Louise Broadbridge, senior midwife & the face of instagram's @thehonestmidwife for a live, online class preparing you and your partner for natural labour, birth and beyond. Enjoyed by 1000's of expectant parents like you.
----------------------------------------------------------------------------------------------------------------
Bake Number Five – Rice Crispy Square Cakes
Prep Time 20 mins
Cool Time 30 mins
Ease of Completion 4/5
Makes 25 Squares
I think I have left the easiest recipe for last! Who doesn’t love a Rice Crispy Cake? The trick with these is to cut them into small squares once set; they are great as a treat at any time of the day! This recipe will make quite a few of them so be aware of that. You want to avoid eating lots of these, they are very sugary. They are best enjoyed as a special treat rather than an everyday cake. Got a birthday coming up or several children? This recipe would be great.
You Will Need
Large Deep Tin
Baking Parchment Paper
Wooden Spoon
Large Bowl
Large Saucepan
Tablespoon
Ingredients
100g Butter or Dairy Free Spread
100g Marshmallows
300g Chocolate of choice – 100g for the main mixture and 200g for the topping
150g Rice Crispy Cereal (or Supermarket Own version).
Method
1. Chop or break 100g of the chocolate into chunks. Empty the butter and marshmallows into a large saucepan, stir continuously on a low heat. When they start to melt add the 100g of chocolate. Stir until all of these ingredients are melted together and smooth.
2. Stir in the Rice Cereal and keep stirring until every bit of it is coated. Once you have mixed thoroughly pour the mixture out into the tin. Using the back of a spoon flatten it out and make it level and even.
3. Melt the remaining chocolate that you have, there should be 200g. Stir continuously to avoid catching. Once smooth you need to pour this evenly on top of the mixture already levelled in the tin. Pop it somewhere cool to set. Once fully set you can cut it up into squares. Bitesize pieces are best in my opinion.
4. You can store the cut squares in an airtight container, they are at their best for the first 24 to 48 hours after you make them.
----------------------------------------------------------------------------------------------------------------
Thank you for reading this article today, I hope you have enjoyed it. To see even more of my bakes and other cooking then please find me on my social media pages. I have tons on my blog including ones with no chocolate. You can also ask me for tips too if you have any questions about any of these recipes! Happy baking everyone! Sabrina